In today's post I want to talk about modular assets for games. Modular basically means pieces of a bigger set that can fit together, and be reused multiple times to build a greater scene. When we started working on Among the Sleep, we were all still students and had never done any (real) work on a game before. What we did in the start was to build levels as one mesh, and export it as one whole block. This created problems when we further down the road realized we had to rethink some of the level design, and had to redo the mesh. Some ugly work were done where we detached whole parts and slapped them on elsewhere and had some unpretty stitching to place it elsewhere. The whole mesh then had to be unwrapped all over, as this process can't be done without destroying some parts of your mesh. It will also create some issues with culling, but that's a whole other subject which I won't delve into today.
So after a while we decided to do some research on modular assets, and it has helped us a lot! Now we just create a number of pieces consisting of walls, doors, floors and ceilings and place them around like a construction set. This makes it that much easier to rebuild your level, and also helps keep your scene tidy, as everything is on a grid. There are a number of good tutorials on how to do modular assets, so I won't go in too much depth on how to do this, but I'll try to write about some of the tips and tricks we've learned on the way.
I'll start with some of the stuff you need to have down before you start, to avoid problems further down the road. I'll also show most examples in 3Dstudio Max, as it is the 3D-modelling software I use, though most of what I show is transferrable to other modelling softwares.
"Pivot! Grid! Units! UV tiling!"
When planning this post, I asked our Art Director if there were any points he wanted me to include. The answer was short and consice: "Pivot! Grid! Units! UV tiling!". So I figured I'd start with that.
Pivot!
 |
| Pivot placed in the lower corner of a very basic wall module |
 |
| Snap settings, snapping two verts and grid point |
Below I've very crudely demonstrated how you can align two wall modules using the snap to vertex-function.
 |
| 2 unaligned wall modules |
 |
| Snapping the pivot of one module to the outermost vertex of another module, creating a perfect alignment |
Grid! Units!
The grid is the squares with which you measure distance. When snapping to the grid it makes it easier to do precise modelling and moving objects around. It's important to set up the grid in your 3D-modelling software the same way it is set up in your game engine. Let's use UDK as an example, where in the editor you generally follow a rule of 2. Assets are almost always dividable by 2, like 64x64 or 64x128 or 256x256 and so on. So you'd want to have a grid in your modelling software that's also dividable by 2.
 |
| Setting up the grid. In my case I like to have a grid of 2,5 cm, and major grid lines every 10 lines These can be changed based on personal preference, as long as they follow the same type of grid as you use in your editor, e.g. don't use 2,5 as a grid in your modelling software if your grid in the editor is based on the rule of 2. |
At Krillbite we use the metric system, and then it's important to also remember to use the correct units in your modelling software. We've had some ugly cases where I forgot to change my units, and my 200 cm tall wall turned out to be 200 inches tall instead. Whoops!
 |
| Setting up my units correctly. |
UV Tiling!
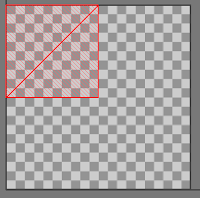
A very important aspect of modular assets is making sure you're unable to see where one module starts and another one ends. To achieve this it's important that your textures tile up. If you're not covering up every single transition between modules with other meshes, you need a tileable texture. You also need to make sure the UVs tile between modules. I'll give an example:
 In this example it is easy to achieve a good result, since the walls are perfectly square, and it's thus easy to fit their UVs. However, you seldom use modules that are just square planes. In this example there is simply no room for any other part of the mesh in the UV space.
When using modules with several other parts that also needs to fit inside the UV space, you can either use two materials for the mesh. Alternatively you can assign a specific space for the part that needs to tile, and draw your tilable texture to this space.
 |
| Here we have to very basic wall modules together. Their UVs tile up, so without the black line you would be unable to tell where the transition is. |


When using modules with several other parts that also needs to fit inside the UV space, you can either use two materials for the mesh. Alternatively you can assign a specific space for the part that needs to tile, and draw your tilable texture to this space.

In my next post I'll write more about specific modelling techniques I've picked up when working on modular assets.
Games of the moment: Planetside 2 and Chivalry!
Happy gaming!
-Svein
No comments:
Post a Comment